How To Use
The application is very easy to use, but if you get stuck this guide should answer all your questions.
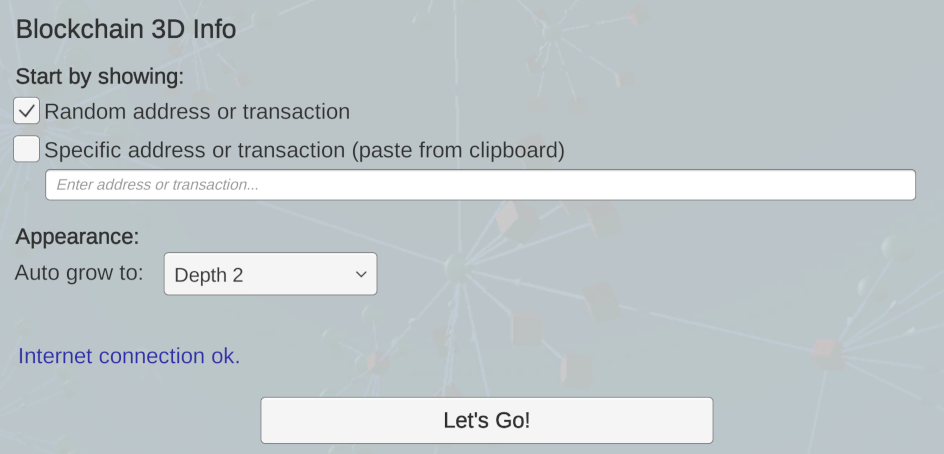
Initial Screen
When you first start the application you see the initial screen, this is where you choose:
- What you want to see - this can be an individual address or transaction, or you can let the app choose something to show you.
- How you want to see it - you can specify an auto-grow depth to allow the graph to grow automatically. The graph will grow until all branches from the start point have reached the specified number of “hops”. Choosing a depth of 1 or 2 is good. Choosing a depth of 4 can look pretty, but can also need to slow performance depending on your PC. In any event you can grow the graph manually by clicking on shapes on the screen.
Control Summary
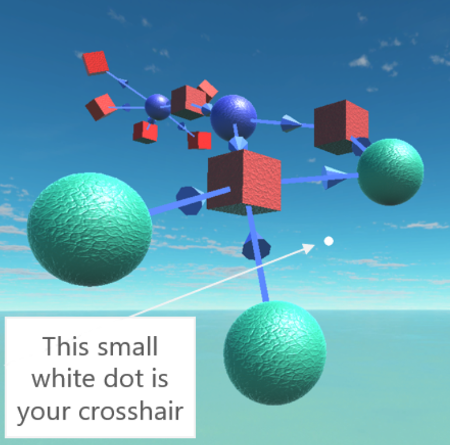
Once you’ve chosen what to see and how to see it, press the Let's Go button on the initial screen. You are taken into the Bitcoin network “world view”. The little white dot in the centre of the screen is your crosshair. The crosshair shows what you are looking at. An item (a Bitcoin transaction or address) turns white when it is looked at, and the crosshair will expand into a circle if you can interact with that item.
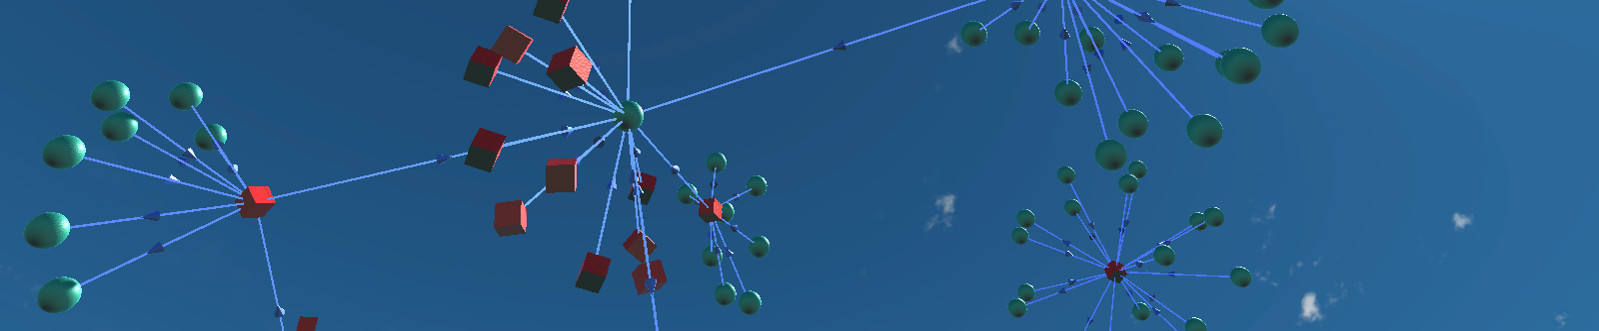
World View Screen
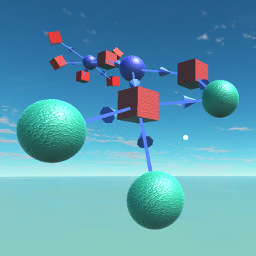
Bitcoin transactions are shown as blue spheres and Bitcoin addresses are shown as red cubes. The lines joining addresses to transactions are referred to as links in this application.
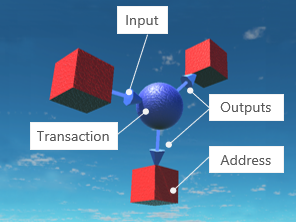
In your typical personal banking account a transaction moves money from one account to one other account. It is a one-to-one relationship. With Bitcoin, transactions can be from one or many addresses to one or many addresses. A typical Bitcoin transaction is shown in the diagram and consists of:
-
Inputs that move Bitcoin from an address into a transaction. These are shown as blue arrows going into the transaction. They have a value associated with them.
-
Outputs that move Bitcoin from a transaction into an address. These are shown as blue arrows going out of the transaction. They also have a value associated with them.
Expanding Addresses and Transactions
Move the crosshair (the little white dot) until it is over the address or transaction you want to know more about. The item will turn white, and the crosshair dot will expand into a circle if the item can be interacted with. Then click or tap to see more links associated with that item.
Some addresses have many hundreds of transactions and some transactions involve many hundreds of addresses. Instead of trying to display all of these links at once, the system starts by showing only the first few links. Then you can display more links by looking at the address or transaction and tapping the screen or clicking the mouse.
The screenshot shows an example of a transaction that has many links, and the system is displaying 1 link out of a possible 143.
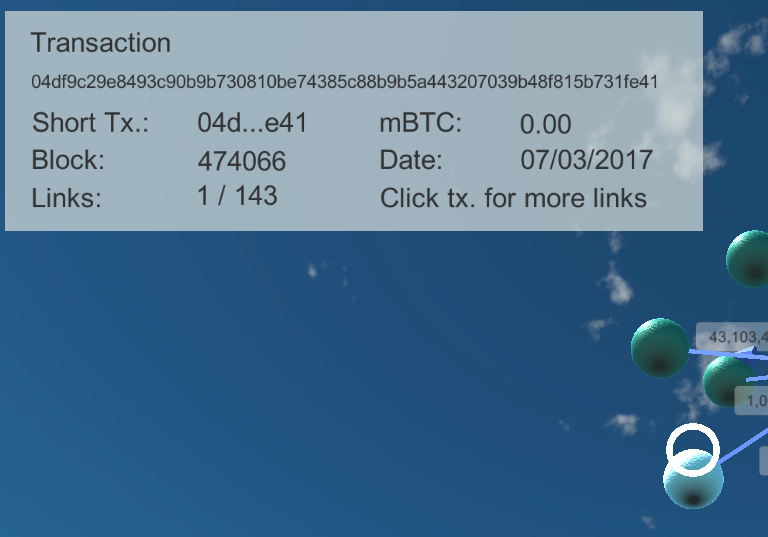
Addresses and transactions change to a darker colour after all their links are displayed.
You can keep adding more and more items and following their links basically until your hardware starts to struggle. On standalone builds (Windows, MacOS, Linux) you can press P on the keyboard to toggle the physics calculations on and off. Physics is switched back on automatically if you display more nodes.
Keyboard Controls
The following keyboard controls are available:
| Key | Description |
|---|---|
| L | Toggle labels |
| M | Toggle mouse inversion |
| G | Toggle auto-grow of graph |
| P | Toggle physics (improves performance). Physics is switched back on automatically if more items are added to the view. |
| Esc | Toggle mouse being used by the app (frees mouse to use on your desktop) |
| WASD | Fly forward, left, back, right |
| QE | Float up and down |